

So I approached my husband about making a set of shutters for the house. As always, he just wanted a picture of what I wanted; he was ready and willing to take on a new challenge. Not sure about the style I wanted, I began a new search for different styles of shutters , I never realized just how many styles there were.
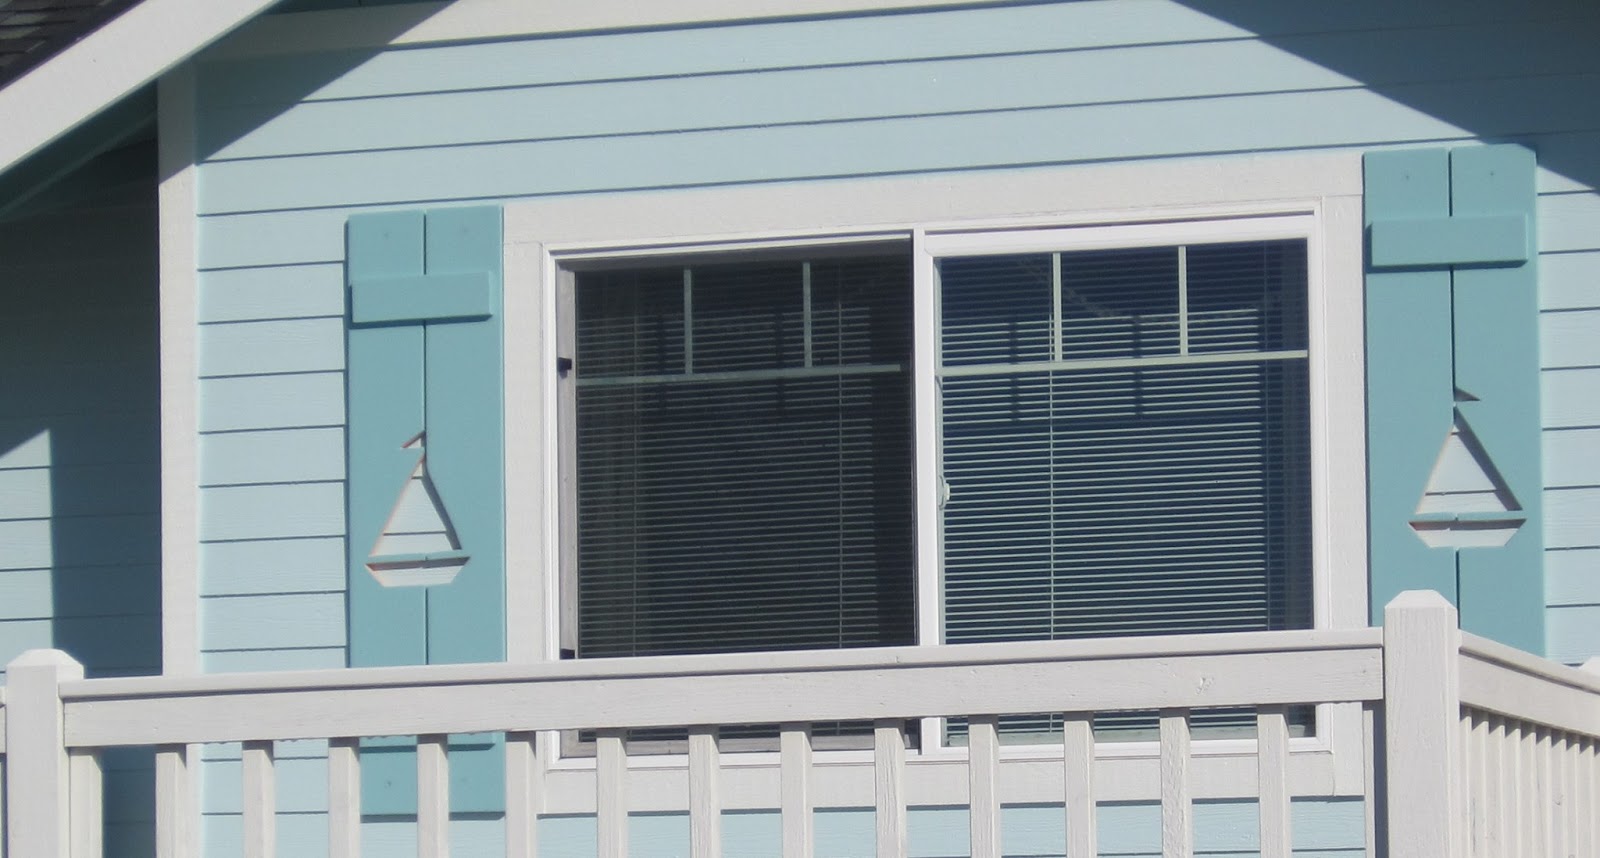
Since ours were purely decorative , we didn't storm hinges because they would be permanently attached in the open position. I found this adorable sail boat shutter and fell in love!

We decided to make our shutter the same size as the ones pictured here. the exact size of our window. Which was great because as it turned out , one 8ft. board cut in half was exactly the right size for one shutter! And Home Depot even cut them for us! Yay!
My husbands list for this project: Total cost
a wallet saving $40.00 !
2 ) 8 ft. pine boards 1" by 6" wide pine boards ( you use whatever wood you like)
1) 6 ft. 1" by 4" board for the cross bars. this board will be cut into 4 pieces 1 inch shorter then the shutters.
Wood Glue ( yellow kind heavy duty)
24) stainless steel wood screws 1 7/8 inch
Jig saw for cutting out sail boat Or whatever pattern you choose.
template for cut out
exterior paint
After lightly sanding all of the ends of the boards , the shutters were temporarily assembled so template pattern could be positioned where we wanted and transferred on to the boards . disassemble the shutters, then using jig saw cut out sail boat pattern .
Lightly sand the new cuts. At this point you can assemble them permanently then paint. Since our shutters needed to withstand blistery winds &the heavy rains of coastal Washington, my husband opted to paint all parts 2 times before reassembling. Hint doing this makes wood last longer, and if you forget to mirror the images there's no problem because all sides are painted.
Once dried lay out your shutters ,measuring 6 inches from the top and bottom edges for placement of cross bars.Using wood glue on back side of each cross bar, place on shutters, and screw in place. using 4 screws in each cross bar, 2 for each board .
Now your ready to mount your shutter to your house . Four screws were used in each shutter . If you look closely you can just make out the outline of the final screw placement. My husband touched up the screws with paint.
Now that's personality !!

People have stopped by several times since we have painted ,asking what colors we used and telling us how much they love it!
Neighbors have stopped by too, happy to see the"little house" isn't sitting empty anymore and loving the new look!
,
No comments:
Post a Comment